Creating a New View
We now have a way for Stationary Inc. to go through their company assets, and then note down what should happen for each asset. However, the company will quickly have a problem if they need to open every single asset to find out whether it needs to be sold, repaired, disposed of, etc.
Let’s create a new view, which will allow the company's auditors to quickly see all assets and their Audit Action. First, make sure you are on the main Assets table in Explorer. Now, press the view button, and select Create View.
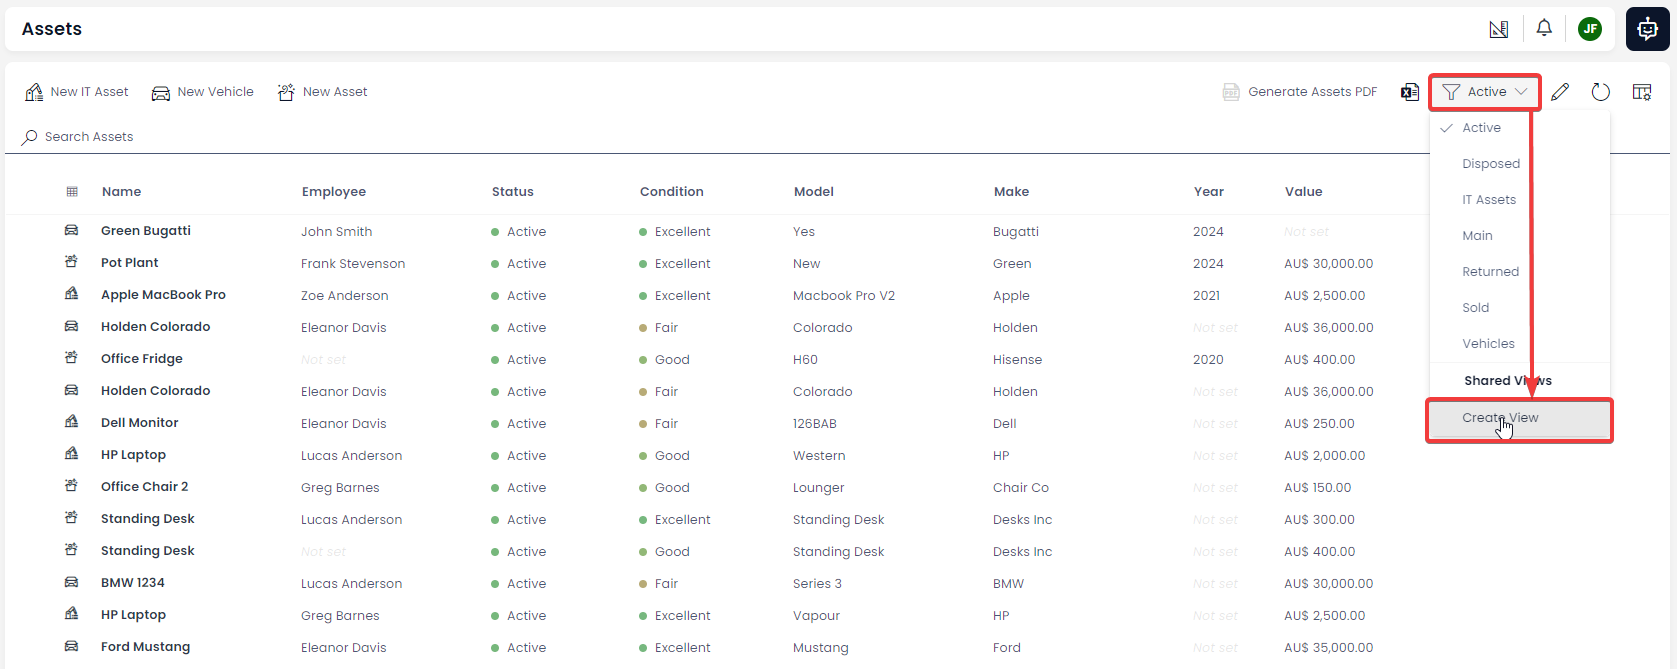
Note in the screenshot above that there are already several views that have been created, such as Active, Disposed, etc. We will be creating a new view that will be added to this list.
1. View Title
The Title is what will appear in the drop-down view menu we just saw. We’ll call this view “Audit Actions - All".

2. View Sorting
We can also choose how the column will be sorted. For us, we probably want to SORT the table so that all the Assets that are being Sold are grouped together, and all Assets being Repaired are together, etc. We can do this by choosing the Audit Actions column as our sorting column. We can then choose Ascending or Descending, which means the items will either be sorted alphabetically, numerically, or by date, depending on what column we are sorting by. For this sort of data, this distinction doesn’t matter.

3. View Columns
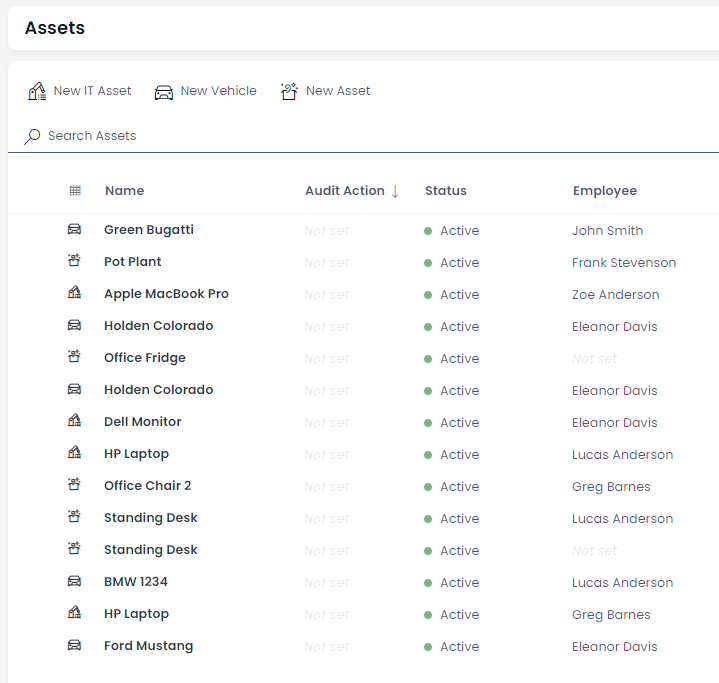
We will come back to the filters in a moment, let’s skip down to the columns section. Here, we choose which columns are visible in the view we will build. We want to see the Name of the Asset, as well as its Audit Action, and the Status so we can compare them. Also including the employee who is attached to the Asset could be useful, so we’ll choose to place this column at the end of the view's columns.

Note that here you can click and drag the column names in order to rearrange them.
4. View filters
Okay, now let’s adjust the filter. We don’t care about assets that have “No Action” next to their name. Instead, we just want the assets that require action. Filters require Rules that they must obey.
We want to apply a filter using the column Audit Actions. There are some Logical Operators that can also be applied, that provide logic for how the rule behaves.
What not to do
Let me first show you the wrong way to handle this problem, we could say to Rapid, show me all the Assets that have the Audit Action which is...Sell. Then I could add another Rule, and say:
Show Assets that have the Audit Action "Sell"
OR
Show Assets that have the Audit Action "Repair"
OR
Show Assets that have the Audit Action "Dispose"
The problem is, what if we add a new action to our list? Then we will have to remember to come back here and add that rule. It will be easy to forget that you created the view like this, and so you’ll be left scratching your head when a new type of action isn’t appearing in your view.
A Better Approach
There is an easier and better way of doing this. Instead of listing all the things that the Audit Action could be, we instead do the opposite. We are going to tell Rapid:
Only show the items that are NOT set to "No Action".
Functionally, this does the same thing. However, it will future-proof our view if we ever add more Audit Actions.
We do this by selecting our logic from the dropdown boxes, and ensuring that the equals sign ( = ), to the does not equals sign ( != ).

Notice there are other logical operators here that we can use, such as:
| Logical Operator | Meaning |
|---|---|
< | Less than |
<= | Less than or equal to |
> | Greater than |
>= | Greater than or equal to |
| Has value | Returns any item where the selected field is not empty |
| No value | Returns any item where the selected field is empty |
| Contains | Returns any item where the selected field contains specific information, such as a number or a string of text |
5. Save the View
Let’s save our view, by pressing Save at the top of our editing sidebar.
6. Check the View
Now, we can use our view, and check that it works.
If you need to edit a view once it has been created, you can do so by pressing this button in the Command Bar.
